What to Bring and Wear Aurora-Watching

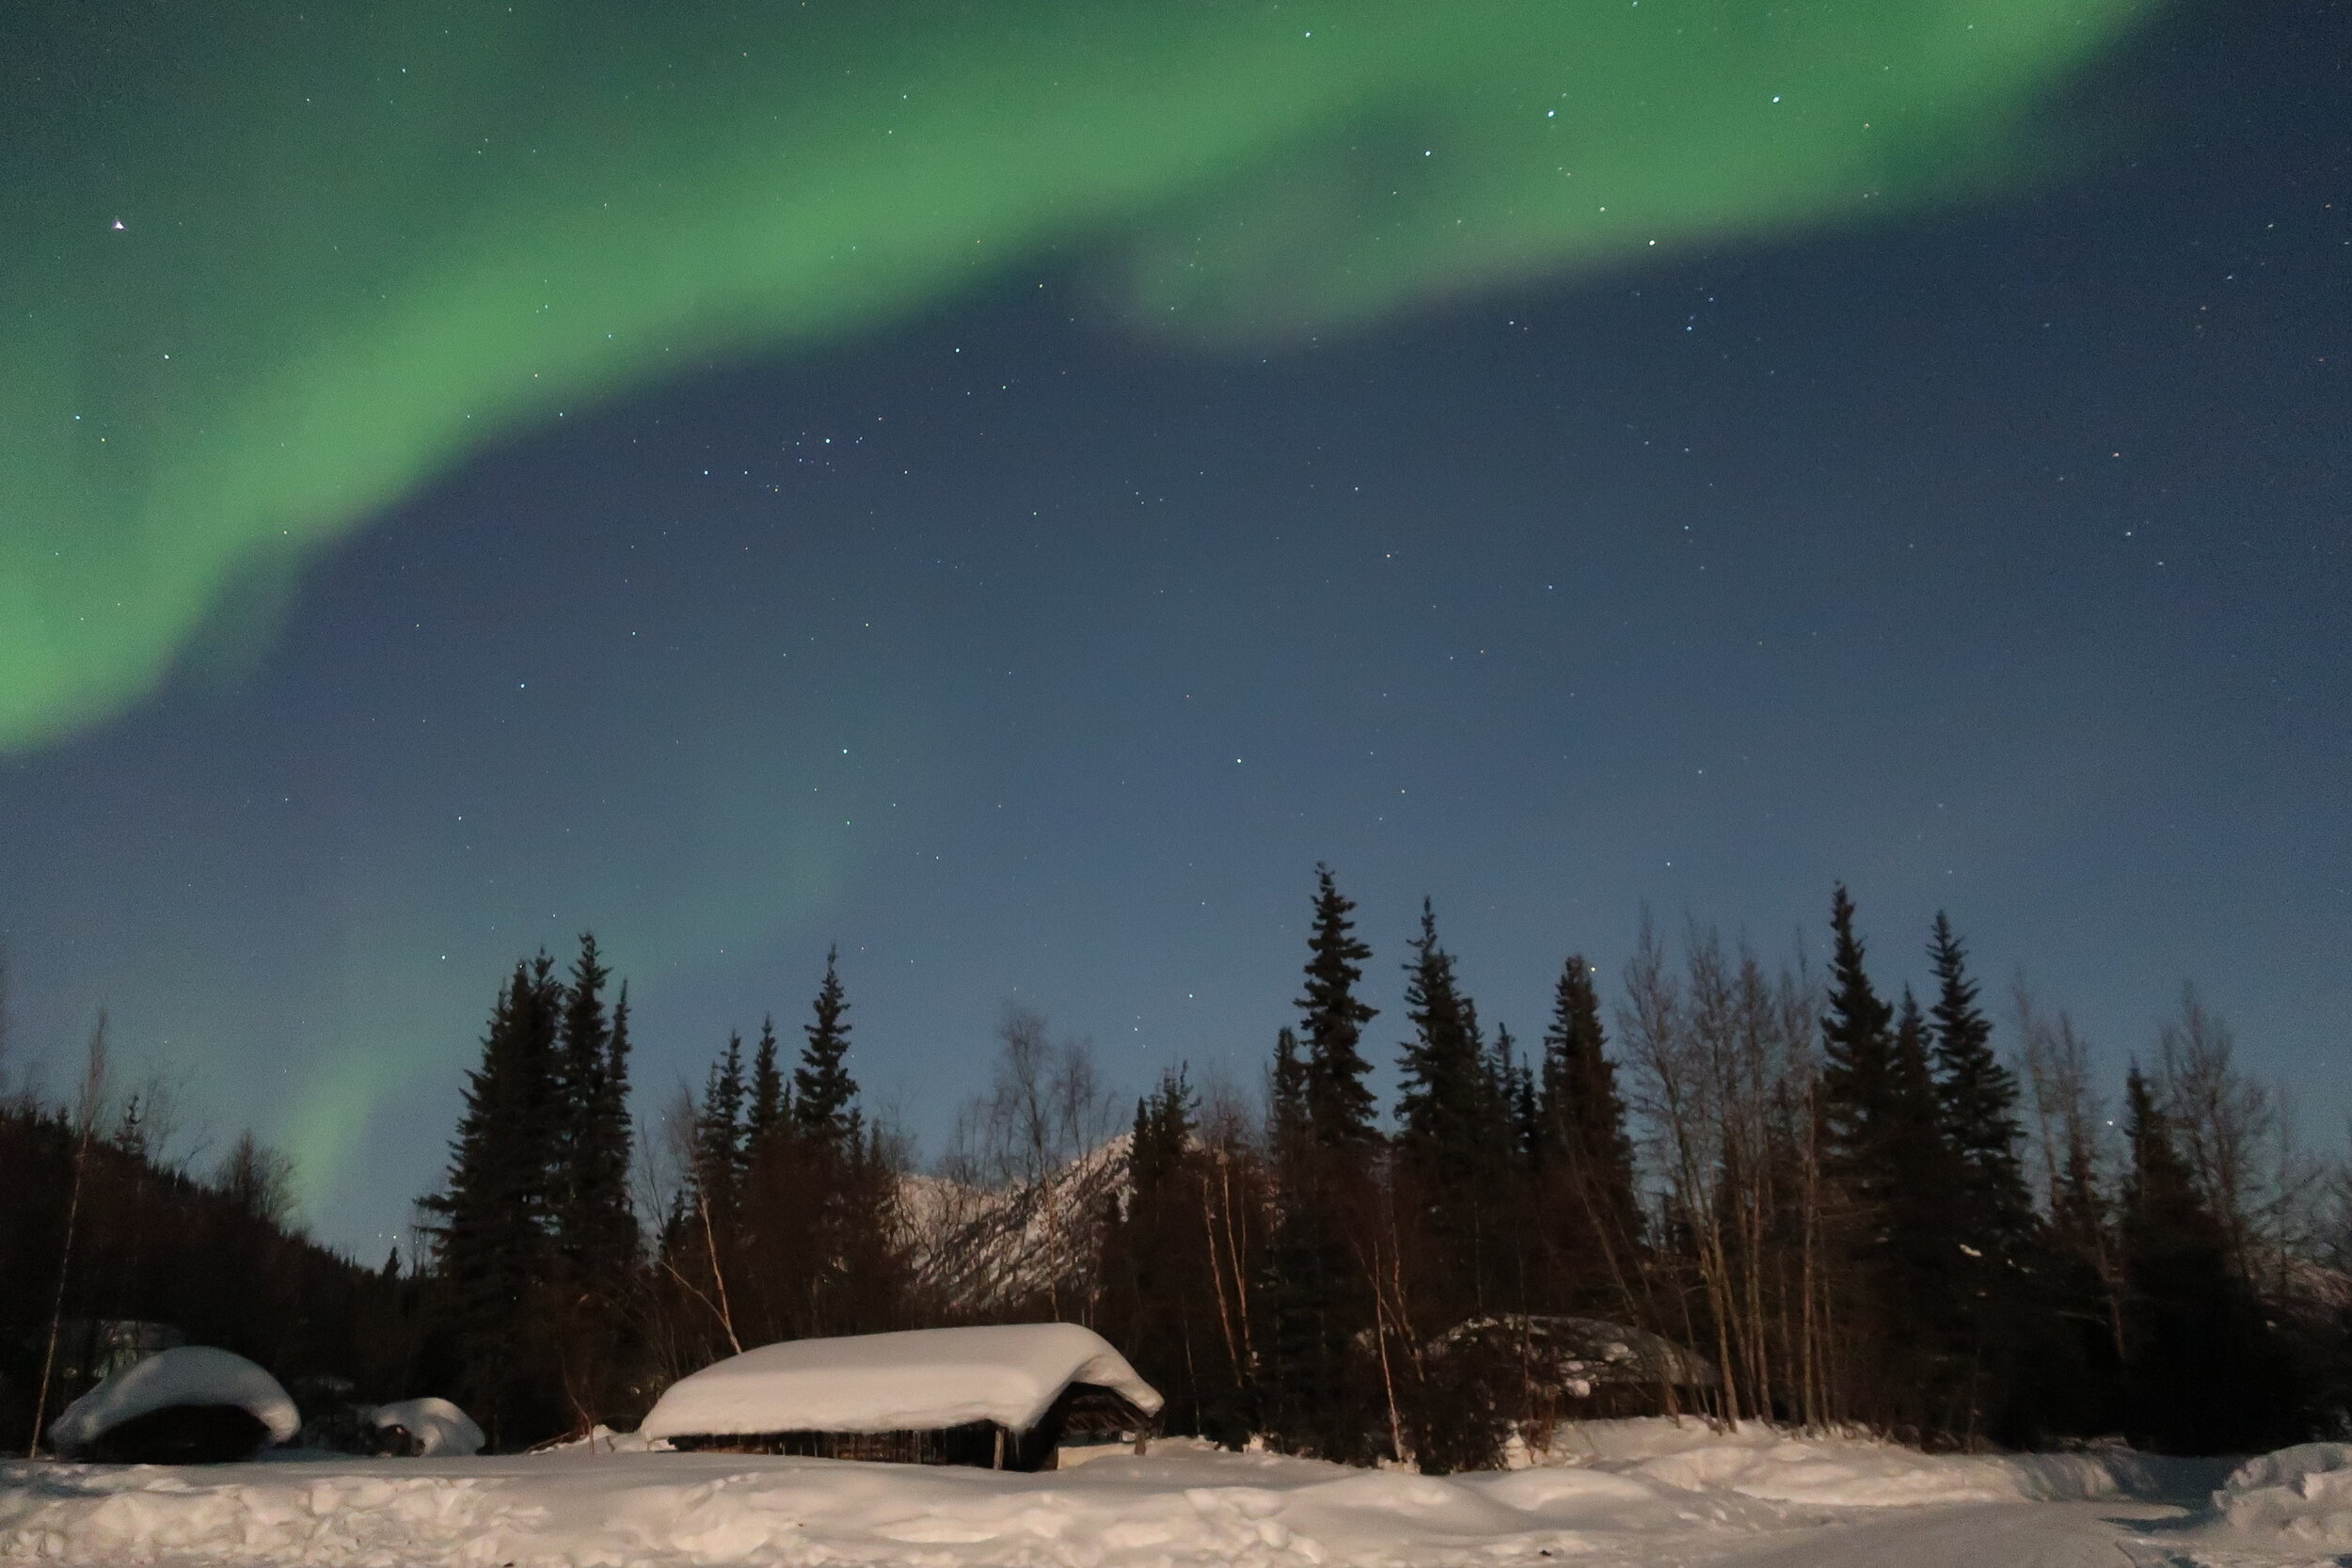
Whether you’re watching the aurora from behind the North Inn or Wiseman with us, one thing will usually be true: it’s going to be cold

No matter where you’re from and what kind of weather you’re used to at home, it can be tough to stand outside in the cold for long enough to spot a great aurora. And there’s no worse feeling than having to leave a great display to go back inside and warm up. 

If you come with us to Wiseman, you’ll have access to hot drinks in a heated cabin, as well as a double-barrel stove outside to keep warm. But, you can’t see the aurora from inside. And if you don’t have the right gear, then even standing next to the stove can get chilly--especially for your feet and hands. 

If you’re already coming all the way up to see us, make sure you maximize your chances of spotting and enjoying the northern lights. 

Pack these coworker-recommended essentials to have the best and most comfortable aurora-viewing experience possible!

Wear These…

Coat

First and foremost, don’t forget to bring a warm coat! (Seriously, you’d be surprised.) 

If you’re purchasing a coat specifically for your trip, don’t worry about spending a ton of money. Springing for a Canada Goose parka really isn’t necessary. There are plenty of reasonably priced options that will keep you warm, especially if you layer up. 

As you’ll probably notice when you arrive, most coworkers (and Alaskan locals) favor Carhartt bibs and coats--for good reason: they’re affordable, rugged, and will keep you way warm. Even the crews that work along the haul road are often wearing Carhartts, and they’re usually outside working for hours at a time regardless of the weather. 

Just one thing: make sure you’re purchasing the workwear, and not the streetwear. While trendy, the streetwear isn’t quite as practical for cold-weather exploring as the workwear is. Specifically, check out the “Extremes” line: these coats are specifically designed for adventuring in Alaska, and the one-piece design of these bibs will block the wind. 

If you’re already in Fairbanks without a coat, check out Big Ray’s or Value Village to pick one up last-minute! There are also gear rental spots in Fairbanks where you can pick up a coat and boots for a few days, and return them at the end of your trip. 

Boots

We’re sorry to say it, but hiking boots just won’t cut it. Neither will sneakers. Heels and stilettos won’t, either, and actually could be pretty dangerous on the ice. (Again, you’d be surprised.) 

Yes, you can buy toe warmers! We definitely recommend them. But toe-warmers work best when you’re also wearing warm, insulated winter boots that’ll keep all that heat in! Most hiking boots, even waterproof ones, simply aren’t built to withstand the cold temperatures (often as low as -30F, sometimes as low as -50F) that aurora-watching demands. 

If you’re looking for a branded option, Sorel and Baffin both make really nice cold weather boots, many of which you’ll spot on coworkers during your time here. But, if you’re interested in a discount pair of boots, go with bunny boots (or, officially, “Extreme Cold Vapor Barrier Boots” developed by the U.S. military)--there are a few military surplus stores in Fairbanks that’ll have them at a reasonable price. 

And, like we mentioned above, if you don’t want to pop for a brand-new pair of boots, or if you don’t want to waste precious suitcase space, you can always check out the gear rentals in Fairbanks! 

Gloves

Gloves are also a necessity, especially for colder nights. There’s nothing more frustrating than having to run inside during an amazing display because your hands (or feet) get cold. And, it could be dangerous, too--frostbite happens quickly here during aurora season. 

As you’ll notice is a theme in this article, layering up can help!

Wear a thin, tech-compatible pair of gloves underneath a bulkier gloves or mittens to reduce the chill (and save you from painful dry skin) when you have to take a glove off to take photos on your camera or smartphone. 

However, like we said, frostbite is no joke. Even with your under-gloves on, try to minimize time outside of your mittens or thick gloves, and make sure your hands stay in your pockets between photos.

Socks

Wear warm socks! The thicker, the better--as long as they still fit inside your boots. (Definitely make sure you try your boots on over your socks before committing.) 

You can also layer ‘em: wear regular crew socks underneath, and put a thicker on over them before putting on your boots. 

Carhartt makes these reasonably-priced Arctic wool-blend socks that will go a long way towards keeping your toes nice and toasty. 

Bring These…

Head Lamp 

Though a head lamp isn’t crucial, it’ll make your aurora-watching experience a lot easier. Part of escaping the urban light shadow is that it gets really dark. So, a headlamp can make, say, a trip to the outhouse a lot smoother. 

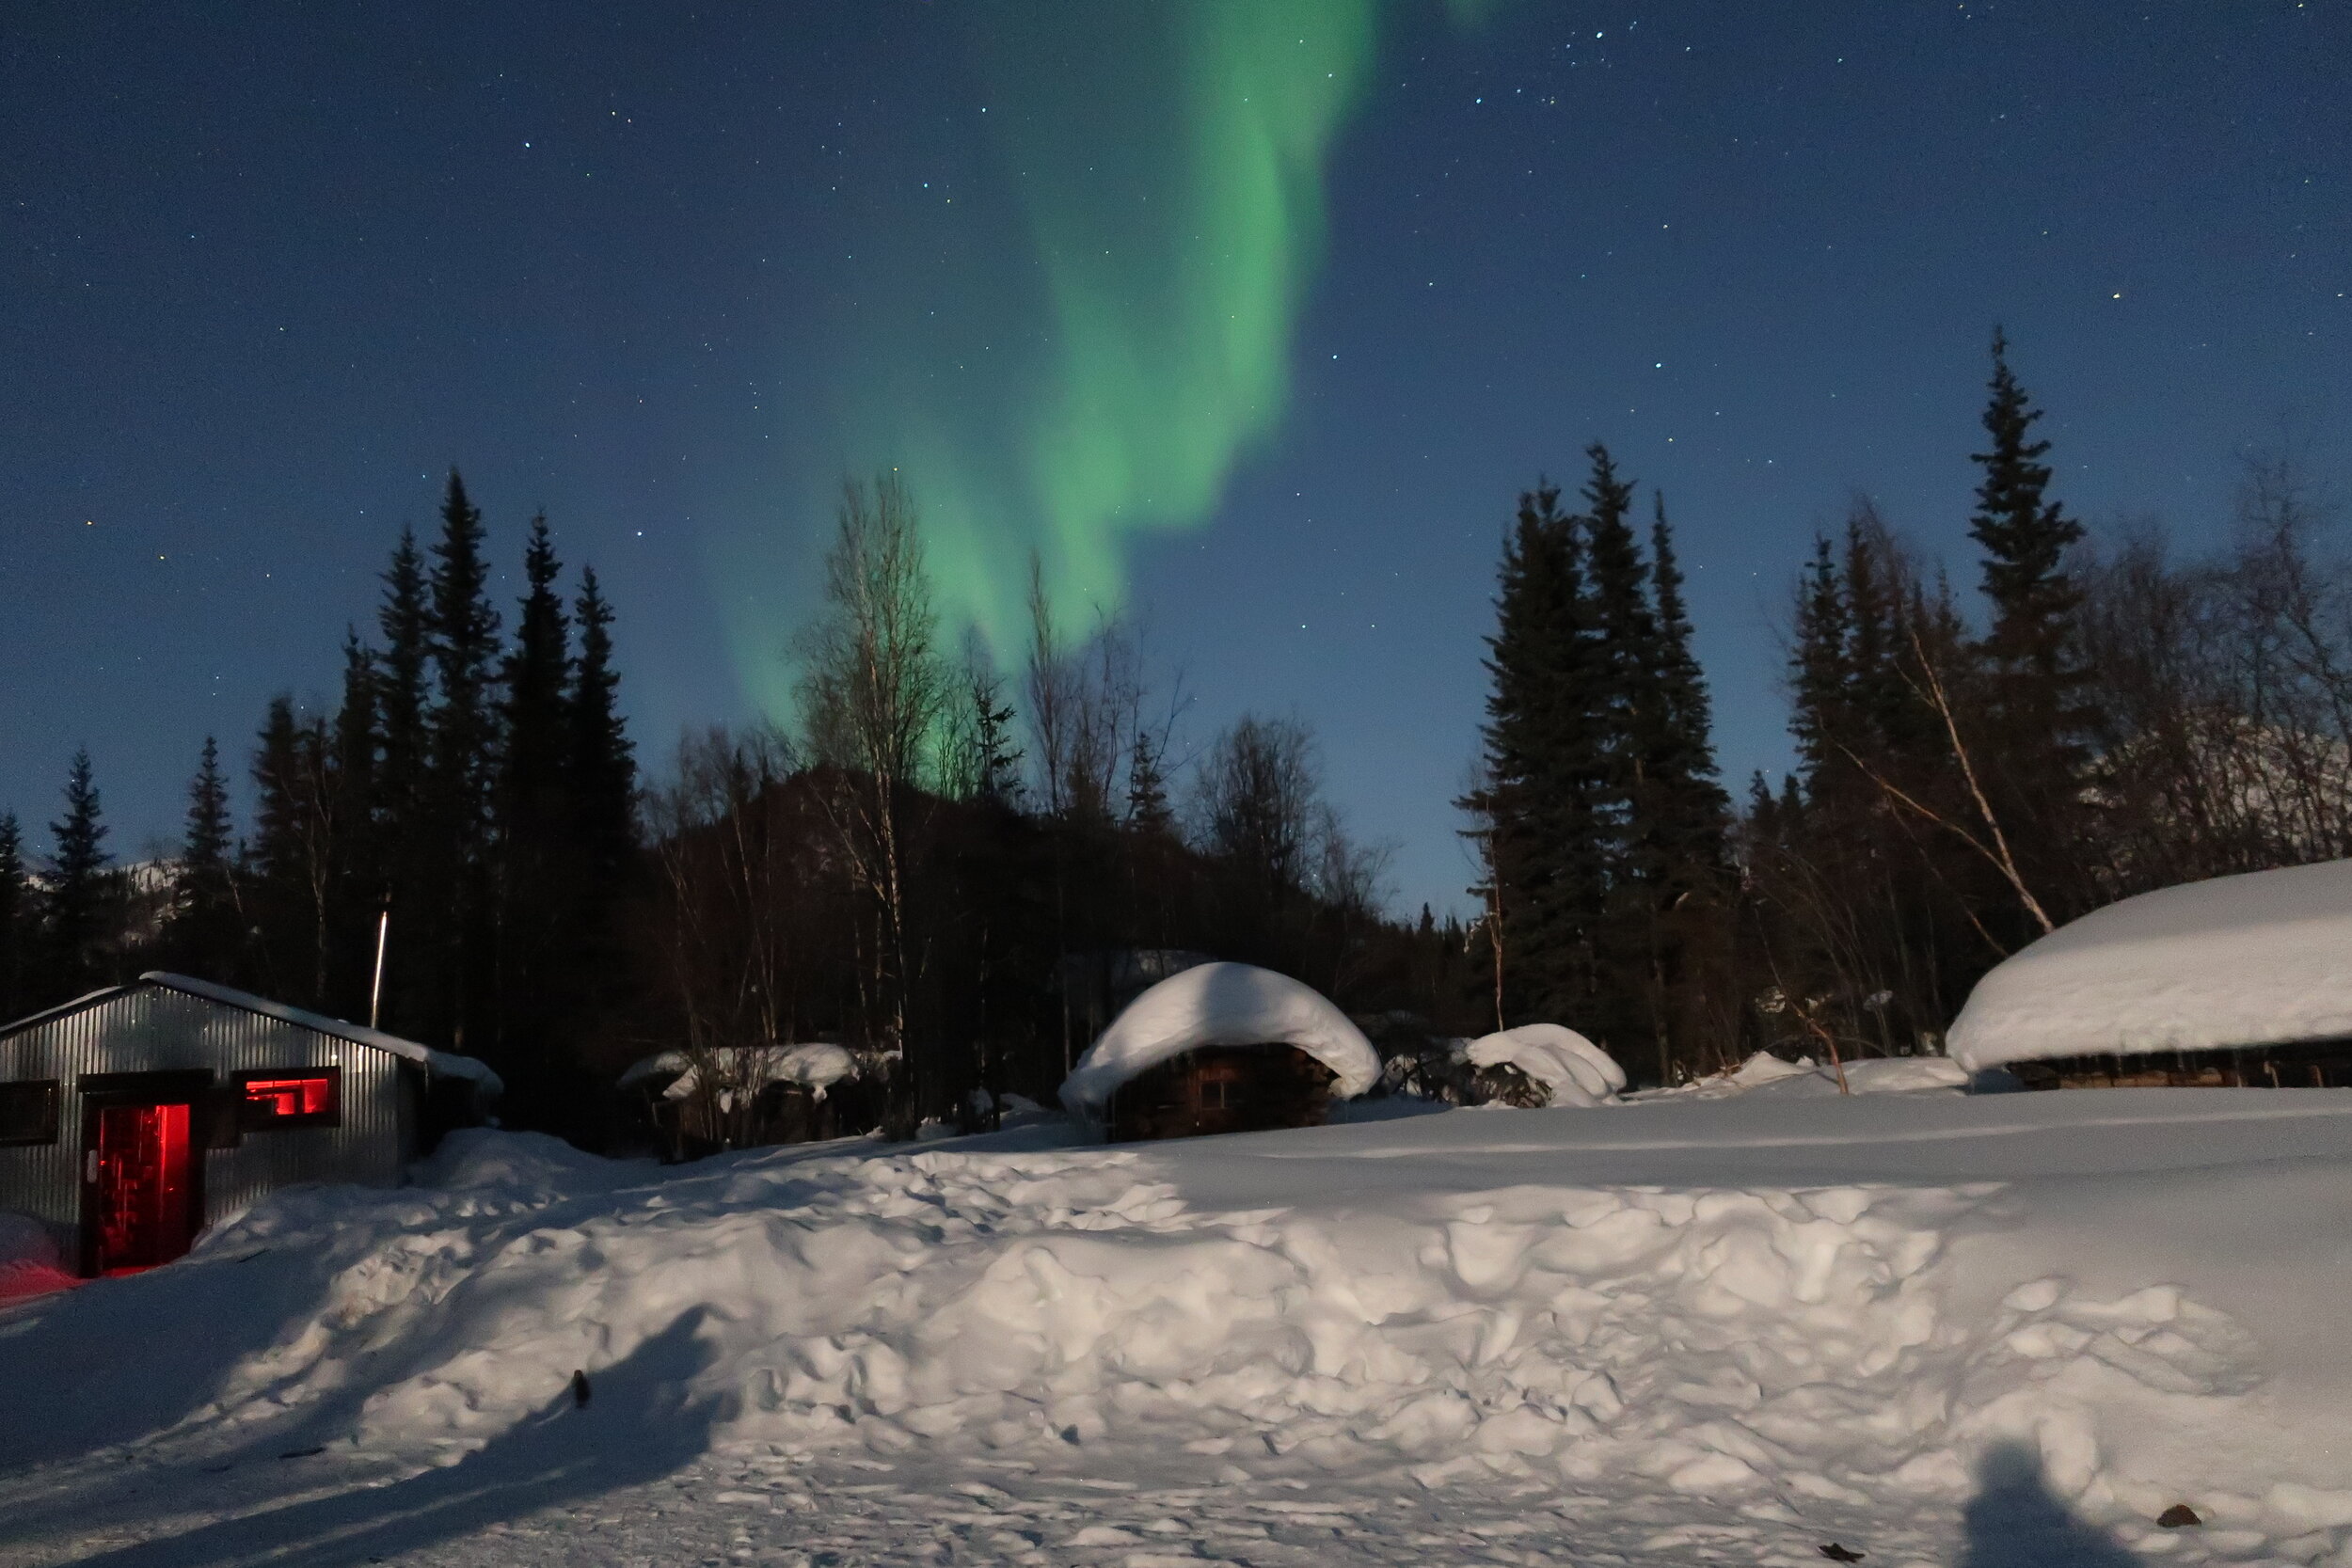
The only thing you’ll want to keep in mind when selecting a headlamp is to make sure that it has a red light setting

Why is a red light setting so important? Simply put, it’s because red light preserves your night vision. 

We do everything we can to reduce light in Wiseman. Turning on a white light forces your eyes to adjust, and, if you accidentally shine it the wrong way, can force others’ eyes to adjust too. Introducing white light into photos can also ruin your aurora and night sky pictures. 

Tripod 

Like we said in our article on photographing the aurora, a tripod is essential! Because you have to use such a long exposure to capture the northern lights, getting a clear, crisp shot of the aurora is almost impossible without keeping the camera totally still. 

If you already have a camera or a smartphone that you want to use to shoot the aurora, it might be worth picking up an inexpensive tripod like this one. (Don’t forget a smartphone adapter if you’re going that route!) 

But if you don’t have the equipment or don’t want to invest, don’t worry. Our guides bring a camera on every aurora viewing trip and can give you details on purchasing the photos from your excursion.

So, there you have it - these are the coworker-recommended basics to wear and bring when you come aurora-watching in Coldfoot! If you’ve already visited and have some essentials that you’d like to share, or if you have questions, drop a comment below!

Aurora Forecasts: What they Are & How to Read Them

All of the photos above were taken in Wiseman on nights where the Kp index was a 2.

So, imagine this. You’re all set to go aurora-watching: you finally made it to Coldfoot, you rented or bought good boots and a heavy-duty coat in town, and you even brought your camera all this way. Then you check the aurora forecast...and it’s only a two. 

Just a two, after you’ve come all this way

Seriously, we get it. If you talk to a coworker in the cafe or your guide on the safari, they’ll tell you: Don’t panic! You should still go out and look for it. You could still see great aurora! 

But...isn’t that just something we’re being paid to tell you in order to get you to go to Wiseman anyway? Nope! Really, it’s not. We know that it’s very possible--even probable, if it’s clear--that you’ll still see the aurora. (And that’s whether or not you come with us to Wiseman.) 

Before we explain why, we should say: the aurora is still a natural phenomenon, which means we can’t control it. We can’t make it come out, or clear up bad weather so you can see it. What we can and will always do, though, is try to make sure you have the greatest possible chances of seeing it--if and when it does come out. 

With that in mind, let us explain why aurora forecasts are probably not the best way of determining how the aurora will look in Coldfoot, specifically.


What is an aurora forecast?

Before we look at why they might not work so well for Coldfoot, first we have to understand what an aurora forecast really is.

You might’ve heard us talk about being located directly beneath the aurora oval. This means that we’re smack dab in the middle of the band where aurora happens. When we see the northern lights, they’re usually directly overhead, and we can see 100% of visible auroras on clear nights. 

Now, let’s move into the forecast itself. An aurora forecast is generally expressed using a number called a Kp index. The higher the index, the higher the geomagnetic activity is predicted to be. The geomagnetic activity creates the aurora, so, the higher the geomagnetic activity, the better the aurora is predicted to be!

So...what’s the catch?

The forecast is simple, right? Kind of...there’s still a catch. And it has to do with how the Kp index is calculated.

The algorithm used to formulate the Kp index is actually designed to let people living outside the aurora oval know what their likelihood of seeing the aurora will be. 

In other words, an aurora forecast describes how wide the “band” of the aurora oval is going to be: or, how far north or south the aurora could potentially be spotted.


What does the forecast mean for Coldfoot? 

The Kp index basically tells us how wide the aurora band is going to be; but, conveniently, Coldfoot is located under the part of the band that stays put. No matter how wide or how narrow the band gets, we’re still smack dab under it--so, if the aurora’s visible and if the weather’s clear, you’ll likely get a glimpse of the northern lights. 

So, the next time you’re out aurora-hunting in Coldfoot, and the forecast is only a 2, don’t fret. We’re not trying to trick you! (Check the gallery at the top for evidence.) The aurora isn’t guaranteed, of course, like any other weather event. And it could still be cloudy or snowy. 

But, by coming to Coldfoot, you’ve already given yourself the best possible chance of seeing the aurora borealis. And while you’re here, the only way you’ll see the aurora is if you get outside and look! 

Photographing the Aurora for Beginners

Seeing the northern lights can be a life-changing experience. If you do get lucky enough to spot the aurora, you’ll want to make sure you’re prepared to take the best photos you can to share with family and friends! 

We know a lot of you are experts (we see you on Instagram!) so if you already know what we’re about to cover, feel free to skip on down to the next post. But, if you’re not an expert--this is for you! 

What to Know First 

Probably the first--and most important--thing to remember is that tripods are a necessity. If you want to get a good aurora photo, whether you’re shooting on a camera or on a phone, you need a tripod! 

It definitely doesn’t have to be fancy (this one from Amazon is under $25) but it does have to keep your phone still through a low-light, long exposure. If you’re planning on using a smartphone, don’t forget a smartphone adapter for your tripod, too. 

Okay. With that in mind, here are the best ways to photograph the aurora using any device! 

iPhone 

For all iPhones except the iPhone 11 Pro, we recommend downloading the NightCap Camera app. iPhones come with great cameras that are capable of taking good aurora photographs, but unfortunately, don’t give you the ability to go in and change the camera settings. 

The NightCap app allows you to take great nighttime photos. The app will bypass manual camera control to automatically optimize your settings for low-light and long-exposure shots that will best showcase the natural beauty of the northern lights. 

Android Phones

Most recent Android phones (especially Samsungs, Pixels, and Huaweis) are fairly easy to configure to take decent photos of the aurora. The basics for setting your phone are as follows: 

  • Set your ISO to 800, or the highest setting 

  • Set your F-stop to 10, or what’s labeled as 1.5 

  • Set the Manual Focus (MF) as high as possible (slide it all the way to the right). 

  • (Make sure your camera is “flipped” the right way! Selfies in “aurora mode” probably won’t turn out so great.) 

If you have an older phone model, or are having trouble navigating your phone settings, make sure you download a pro camera app before you arrive in Coldfoot. We don’t want you to miss out on great shots--it’s better to be safe than sorry! 

Point-and-Shoot Cameras 

Point-and-shoot cameras can vary in terms of quality. The most important thing to check is whether your point-and-shoot camera has a manual setting--if it does, the process for setting your camera up will be a lot like the Android steps above. 

Here’s a great guide to setting your camera (with a manual setting) to shoot the aurora! 

DSLR Cameras

A DSLR camera has a lot more settings--and greater capabilities--than your average camera, especially when you’re shooting something as specific as the aurora. 

Here, it might be good to do a little bit of poking around to familiarize yourself with your camera’s settings before you visit. Playing around with the manual options before crunch time can help you feel more confident in getting shots you can be proud of while you’re here. 

But, we won’t reinvent the wheel. Here are a couple of good guides that professional photographers have put together on aurora photography with DSLR cameras. 

They offer great tips on setting all types of cameras, and even walk you through the photo-editing process afterwards: 

Too Much Work? 

Intimidated by trying to work out all the right settings? Does all of this sound like way too much work? Accidentally forget your extra SD card? 

If you’d rather leave your camera at home, you’re in luck! 

Your aurora guide will bring a camera with them to take photos throughout the evening. You can let them know at the end of your viewing if you’re interested in purchasing those photos, and you can get a USB drive with all the photos of that night’s display. 

We do want to make sure that you know this isn’t a get-rich scheme, like the photos they make you take at theme parks then sell back to you at the end. 

We simply want to make sure you leave with the memories of your aurora viewing experience! 

Now that you’re all set to photograph the aurora on any device, check out our guide on what to wear and bring aurora-watching, or view the rest of our aurora series on the Coldfoot blog! 

We want YOU!

Imagine, for a moment, both of these scenarios...

  1. You’ve Googled us extensively. You’ve read the blog posts. You follow our Instagram. You’ve even combed our social media tags. And still-- you’re daydreaming about what it might be like to visit, or maybe even live in the Alaskan Arctic.

  2. Or, you’ve already come to visit, and you loved your time here. You posted photos, told your friends and family about your trip, and even have Sukakpak set as your computer background. In fact, some might say, you haven’t been able to stop thinking about the Arctic since.

Sound familiar? If we’re literally describing you right now:

First of all, we’re flattered. Second of all, we’ve got great news: we have open positions at each of our camps for the upcoming season for responsible, friendly, and adventurous coworkers.

Here are the details and the application.

Let’s talk. The extreme Arctic might just be your next adventure!

No Cold Feet: Essentials (and Optionals!) for a Winter Trip to Coldfoot

There’s no arguing that Coldfoot shines in the wintertime: we’ve got incredible wildlife, pristine snowy landscapes, and beautiful mountains bathed in alpenglow. Not to mention, of course, some of the best views of the aurora borealis in the world!

What’s the catch? Few places in the world experience winter quite like we do. Recently, the temperature dropped down to -44 in the area. We do average a little warmer, around -20, but still..most folks would hardly call it balmy.

Some of the most common questions we’ve heard from guests in the winter months go something like this: How do I prepare for winter weather in Coldfoot? What should I bring? Is there anything I should buy?

Our best advice: don’t be nervous! Here are some winter-weather essentials and not-so-essentials (both tips and gear recommendations) to make the most of your winter trip to Coldfoot.

Image by Brandon Gray.

Image by Brandon Gray.

Remember, layers are key!

For a quick visit, it’s less about quality than quantity. Don’t feel like you have to spend hundreds of dollars on gear for a short vacation! Just bring lots of layers, and don’t be afraid to wear them--especially if you’ll be joining us for an outdoors excursion.

We always like to remind people that being over-prepared is much better than being under-prepared. You don’t want to miss out on the incredible outdoors scenery. And you can always take off layers if you’re too warm!

If you don’t own anything you think would be suitable, there are winter gear rental services available in Fairbanks, as well as a number of outfitters and a thrift store. You’ve got lots of options.

Scarves, gloves, socks, boots, sunglasses

These might seem like obvious picks, but they’re definitely worth double-checking your bags for before you make your way north.

A scarf or neck warmer to cover your face can make breathing more comfortable if you want to play outside.

Good gloves are essential: you can even layer tech gloves under winter gloves if you plan on taking a lot of photos!

Warm feet can be the difference between a rough day and a great one. Wearing a pair of wool socks to wear over your regular socks can help you keep warm all night as you go aurora-scouting.

Likewise, good winter boots are crucial if you’re planning on exploring, hiking, or snowshoeing around in camp while you’re here. If you don’t already own a pair, there are plenty of outfitters (and a thrift store) in Fairbanks that sell gear at reasonable prices; or you might choose to use a rental service, instead.

Finally, don’t forget your sunglasses! Wait, isn’t it dark up there all winter? When we do outdoor activities (besides aurora watching), we try to maximize daylight. What sun we see can reflect off of all the snow and make for a very bright view.

Less obvious picks: headlamp, ice grips

A headlamp with a red-light setting is super useful if you plan on aurora-watching with us. Why red light? White light throws both eyes and cameras off in the darkness. Red light allows you to move safely outside without ruining your (or anyone else’s) photos.

Ice grips (like YakTrax, for instance) can be helpful if you struggle to walk on ice, or if you’re worried about safety. We plow, but even getting from the cafe to the inn requires a walk outside. They’re super optional, but do make a difference--so we like to mention them just in case!

You choose!

Part of experiencing winter in Coldfoot is slowing down, relaxing, and moving with the outdoor world. We don’t have cell service (unless you’re a GCI customer), and WiFi costs money. Instead, consider taking some time off from being plugged in.

We’ve got a cozy space with hot cocoa, tea, and coffee: you bring a book, a notebook, a journal, a coloring book, a sketchbook, a board game, a card game, or...well, you get the idea. It’s the perfect time to enjoy something you wouldn’t have time for in the “real world.”

Still feel like a lot to think about? Like we said up top: don’t sweat it. If you’ve still got questions, don’t hesitate to ask. We want you to enjoy your time in the Arctic, and we’re happy to help you as much as we can!

Do you have any cold-weather essentials you can’t live without? Drop a comment below and let us know!

Aurora Lore: Myths of the Northern Lights

Nowadays, we’ve come to accept the scientific explanation of the northern lights: it’s a particulate reaction with the atmosphere influenced by Earth’s magnetic fields. Pretty simple, right?

But when you’re standing right below them–staring straight up and watching the lights shimmer, dance, and change colors overhead–it becomes easy to understand why the aurora borealis is the subject of so many folk tales.

Photo by Jackie Veats

Photo by Jackie Veats

It’s absolutely otherworldly.

Stories come from places as far apart as Iceland, Greece, and China, and legends of what the aurora borealis represented vary just as much. Here’s a compilation of some of the most popular aurora legends from cultures around the world.

International Folklore

Greenland: Indigenous Greenlanders believed that the aurora was made up of the spirits of children who had died in childbirth.

Iceland: In Iceland, the northern lights were thought to relieve the pain of childbirth, but only if the mother didn’t look directly at them. If she did, it was believed that she’d give birth to a cross-eyed child.

Finland: In Finnish, the word for aurora is “revontulet,” which translates to “fox fires.” In Finnish lore, the aurora is caused by a fox running so fast across the snow that its tail sparks flames up into the sky. The Sámi people believed that the lights were created by a whale’s water spew.

China: Because of their latitudinal location, the Chinese rarely saw the aurora borealis. However, when they did see a rare display, they thought the northern lights were the fiery plumes on the breath of good and evil dragons, battling each other across the night sky.

Photo by Kenji Sato

Photo by Kenji Sato

Russia: Similarly to the Chinese, Russians believed that the aurora was a massive fire dragon. The difference? According to the Russians, the fire dragon would descend to earth while a village’s men were away in order to seduce the remaining women.

Greece & Rome: The Greeks and the Romans believed the northern lights represented the visible path of the dawn, named Aurora. She rode her chariot across the sky each morning to warn her siblings–the sun and the moon (Helios & Selene)–that a new day was coming.

England & France: The few times the English and the French happened to see an aurora display, the lights seemed to correlate with a war or other tragedy. So, to the English and the French, the red sky was an omen of bloodshed or ill fortune. 

Photo by Jackie Veats

Photo by Jackie Veats

Myths from North America

Indigenous people in North America had the most diverse range of beliefs about the northern lights, believing it to be anything from a battle omen to walruses playing ball with a human skull.

An excerpt from The Labrador Eskimo by explorer Ernest W. Hawkes:

“The ends of the land and sea are bounded by an immense abyss,
over which a narrow and dangerous pathway leads to the
heavenly regions. The sky is a great dome of hard material
arched over the Earth. There is a hole in it through which the
spirits pass to the true heavens. Only the spirits of those who
have died a voluntary or violent death, and the Raven, have been
over this pathway. The spirits who live there light torches to
guide the feet of new arrivals. This is the light of the aurora.
They can be seen there feasting and playing football with a
walrus skull.

The whistling crackling noise which sometimes accompanies the
aurora is the voices of these spirits trying to communicate
with the people of the Earth. They should always be answered
in a whispering voice. Youths dance to the aurora. The
heavenly spirits are called selamiut, “sky-dwellers,” those who
live in the sky.”

Photo by Jackie Veats

Photo by Jackie Veats

To the Saulteaux tribe of Canada, the northern lights were the dancing of human spirits.

The Fox people of Wisconsin believed the lights were spirits of enemies killed in battle come back to visit pestilence and famine; the Mandan people of North Dakota thought they emanated from fires lit by powerful warriors–over which large cauldrons filled with dead enemies simmered.

Some Inuit groups thought they were spirits of animals they’d hunted, like belugas, caribou, seals, and salmon. The Menominee of Wisconsin said they were huge torches friendly giants used on hunts to help spear fish.

A popular legend stated that the lights were human spirits playing ball with a walrus skull. People on Nunivak Island told it the opposite way, where walrus spirits played the game with a human head.

The Algonquin people believed it was the fire of Earth’s creator retired to the north, its bright reflection in the sky a reminder that he still remembered and cared for his people.

Only the Native people of Point Barrow believed it was evil; they carried knives and weapons when traveling outside at night to defend themselves.

So, which myth best describes the northern lights?

We’ll let you decide for yourself!

Photo by Nickolas Warner

Looking for more information?

Check here: [1][2][3][4][5]

Where are the Animals?

Many people come to Coldfoot and the Brooks Range and one of their first questions is, “Where are the animals?”   We don’t see them every day as they rarely come into camp.   But they are out there.   Take your camera and take a walk around Coldfoot.  If you keep your eyes open you will see signs of many different types of animals that inhabit this area.   Take a walk along the creek and see what footprints are in the mud.  The other evening I walked to Slate Creek and there were raven prints.  I also saw grizzly footprints following both a large and a small set of moose prints…a cow and a calf most certainly!   Wolf prints were in the mix as well, and there were boot prints!   A human!!

While I had my head down I came upon some moose scat…a large pile (the cow) and a tiny pile (the calf).  An lo and behold what else did I see but a pile of wolf scat.  All this in about 15 minutes!!  Scat and prints…two very interesting things to find.   If you find scat don’t let it put you off.  Go get a stick and prod around in it to see who or what that critter has been eating.   Do you see lots of fur?   Perhaps they dined on the hares that are a popular tidbit for many local animals.   Piles of moose scat might make you wonder why the nuggets all come out same size and perfectly shaped!  Has the scat been there long?  Is it dry?  Or is it still steaming?  I might leave the area if a big pile of bear scat is still steaming!!!  Try to guess how long it has been since the animal passed by.

If you get tired of looking down, look up.   You’d be surprised at what you might see….a lynx sitting on top of a structure, a great horned owl sitting in a tree, or maybe a bald or golden eagle looking for a meal.   Look at the vegetation…can you see where a moose nibbled on the willows?  Do you see the scratches left by a bear?

If you aren’t used to identifying footprints, scat, or other signs of animals there are field guides available to help you identify the evidence of their presence.  If you aren’t sure, take photos and ask others to help identify them.  Also, it is a good idea to make some noise when you are out looking around so as not to surprise any of our forest friends.

Good hunting!

Hiking Shockpoint

Around Coldfoot there are plenty of mountains to hike, but no trails. It makes for slow, arduous going, but reaching your destination is very rewarding.

If you’re standing in Coldfoot and looking north, the mountain you see is called Slate Mountain, though coworkers and locals call it “Shockpoint.” It’s a moderately difficult hike and can take about six hours for a round trip.

To start, walk about 1.5-2 miles North on the Dalton. You’ll see a gravel road that goes east from the highway. From this point, the mountain looks closer than it actually is. The rough terrain will make the hike longer than you think. Turn right onto the road and head into the woods. If you’re hiking in the middle of summer (like we did), you’ll run into a ton of mosquitoes—bring repellent.

Keep following the gravel road and before long you’ll have to splash across a creek. Your boots will most likely get wet. (I’ve come to expect wet feet when hiking in Alaska.)

The road quickly disappears and then you just bushwhack east for a while. You’ll feel like a moose, lumbering through the trees and bushes, taking long strides across mushy ground.

Recently a few hikers saw a fresh moose kill around here, so they hurried along for fear of the bear that killed it. It’s always good to hike with others. Safety in numbers, just in case.

As the trees thin, you can start to see the terrain sloping upwards. Just keep going uphill.  Use your own best judgment as you pick a route up the slope. The trees end and there’s more rock the further up you get. Once you’re on the ridge, you’re golden. There’s certainly still plenty of climbing to do, but there’s no more tussocks, and not much spongy wet ground. It’s easy walking compared to what you just did. And now you have views the rest of the way!

Just keep heading east and up, higher and higher. At times it will look like you’re almost done, but then you crest that slope and another slope reveals itself.  Don’t let the false summits fool you. You’re done when you can’t go any higher.

It’s easy to get boxed in by the mountains when you’re down in the valley in Coldfoot. But once you’re on top of a mountain, you realize the expanse of the range all around us. It’s awesome.

If you’re ambitious you can keep walking the ridge, which starts to curve North and makes a big circle, which you can see from the summit of Shockpoint. Make sure to pack plenty of water if you plan to do that, though.

When you’re ready to make the return trip, just head back the way you came as best you can. Down the ridge, down the slope, bushwhack to the creek and follow it back to the gravel road, or cross it and head straight West until you run into the highway.

Hiking around here can be tough and sometimes discouraging. Just keep pushing forward and you’ll be glad you did it.

And maybe you’ll get lucky like we did. We saw a lynx!

A disclaimer from the editor: The Brooks Range is the definition of true wilderness. Trails are nonexistent, and rescue support is largely unavailable. Make sure to employ bear & wildlife safety measures when appropriate. Exercise caution and common sense in planning any and all hikes in the area.